
When it comes to sculpting toned thighs and lifted glutes, pilates leg exercises are one of the most effective and sustainable ways for women to build lean muscle, burn fat, and improve overall body balance. Unlike high-impact workouts, Pilates focuses on controlled movements, deep muscle activation, and proper alignment, making it ideal for beginners and experienced women alike.
Pilates leg exercises help strengthen the lower body without bulky muscle gain. They emphasize long, lean lines while improving posture, flexibility, and core stability. Whether you practice at home or attend pilates classes in las vegas, Pilates offers a low-impact yet powerful solution for shaping your legs naturally.
This article will walk you through the 10 best pilates leg exercises that target your thighs, glutes, and hips all no-equipment, beginner-friendly, and designed specifically for women looking for fat loss and lean muscle tone.
Why Pilates Is the Best Workout for Women’s Legs
Before diving into the exercises, it’s important to understand why pilates leg exercises stand out compared to traditional strength training.
Benefits of Pilates for Lower Body
- Builds lean muscle without bulk
- Enhances flexibility and strength training simultaneously
- Activates deep stabilizing muscles
- Improves posture and pelvic alignment
- Reduces joint stress and injury risk
Unlike heavy gym workouts, Pilates trains muscles to work together, not in isolation. That’s why many women prefer Pilates over conventional weight training or cardio.
Many women in Las Vegas choose Pilates because it complements a busy lifestyle while delivering visible results. From home mat workouts to a professional pilates reformer studio las vegas, Pilates adapts to all fitness levels.
Why Many Women Are Turning to Pilates for Stronger, Leaner Legs
When people think about building toned legs, they often imagine intense gym workouts, heavy squats, or long cardio sessions. But many fitness experts now recommend Pilates as a smarter and safer way to strengthen the lower body. That’s one reason why interest in pilates in las vegas has grown so rapidly among women who want real results without putting stress on their joints.
Pilates focuses on controlled movement, muscle activation, and proper alignment. Instead of simply working the surface muscles, it targets deep stabilizing muscles in the hips, thighs, and glutes. These muscles play a huge role in posture, balance, and overall body strength. When they are properly activated, the legs become stronger, more toned, and more balanced.
Another reason Pilates is becoming so popular is its low-impact nature. High-impact workouts can sometimes cause knee pain or hip strain, especially for beginners. Pilates, on the other hand, uses slow and precise movements that protect the joints while still challenging the muscles. This makes it an excellent option for women of all fitness levels, from beginners to experienced athletes.
In fact, many instructors teaching pilates in las vegas emphasize that consistency matters more than intensity. Even short sessions done regularly can produce visible changes in muscle tone and flexibility. Over time, the body learns to move more efficiently, which improves not only leg strength but also overall stability and coordination.
Pilates also encourages mindful movement. Instead of rushing through exercises, practitioners focus on breathing, muscle engagement, and body awareness. This approach helps people connect with their muscles more effectively, which leads to better workout results. When the core and lower body work together properly, everyday movements like walking, standing, and climbing stairs become easier and more efficient.
Another benefit is that Pilates workouts can be easily adapted to different environments. Some people prefer practicing at home with simple mat exercises, while others enjoy structured classes in a professional studio setting. Many participants exploring pilates in las vegas choose guided classes because instructors can correct posture and help activate the right muscles for maximum results.
For those specifically looking to improve leg strength, Pilates movements like leg circles, glute bridges, side kicks, and controlled stretches are extremely effective. These exercises help tone the inner thighs, outer thighs, hamstrings, and glutes while also improving flexibility. The result is long, lean muscle definition rather than bulky muscle growth.
Over time, this type of training helps reshape the lower body in a natural and balanced way. Stronger hips and thighs support the spine better, improve posture, and reduce the risk of injury during daily activities or other workouts.
Because of these benefits, fitness professionals continue recommending pilates in las vegas as a sustainable approach for people who want stronger legs, better mobility, and long-term body strength without extreme workouts.
1. Pilates Leg Circles
This classic move is foundational in pilates leg exercises and targets the inner thighs, hip flexors, and core.
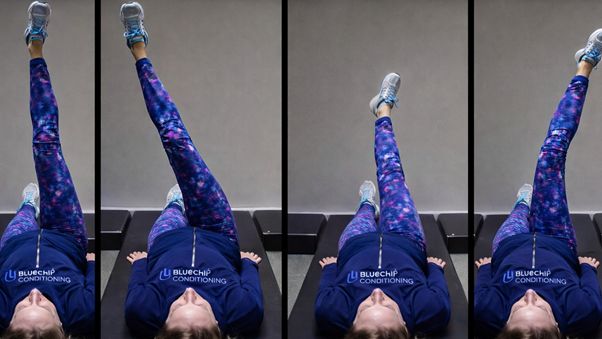
How to Perform:
- Lie on your back, one leg extended upward
- Circle the raised leg slowly
- Keep your core engaged and hips stable
Benefits:
- Strengthens inner thighs
- Improves hip mobility
- Supports fat loss through muscle activation
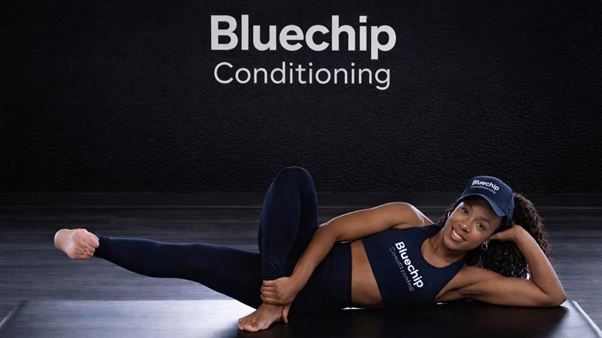
2. Side-Lying Leg Lifts
Side-Lying Leg Lifts are one of the most effective Pilates movements for strengthening the outer thighs, hips, and glutes. This exercise looks simple, but when performed correctly with controlled movement and proper alignment, it activates deep stabilizing muscles and improves lower-body strength without putting pressure on the joints.
One of the simplest yet most effective pilates leg exercises for glute shaping.
How to Perform Side-Lying Leg Lifts
Step 1: Set Up Your Position
Lie on your side on a comfortable exercise mat. Keep your body in a straight line from head to feet. Rest your head on your lower arm or support it with your hand.
Step 2: Align Your Body Properly
Stack your hips one above the other and keep your legs extended straight. Engage your core muscles to stabilize your spine and prevent your body from rolling forward or backward.
Step 3: Prepare the Top Leg
Place your top hand on the floor in front of your chest for balance. Flex your top foot slightly and keep the leg straight.
Step 4: Lift the Leg Slowly
Raise your top leg upward about 12–18 inches while keeping your hips stable and your core engaged. Move slowly and avoid swinging the leg.
Step 5: Hold the Position
Pause briefly at the top of the movement while squeezing your outer thigh and glute muscles.
Step 6: Lower with Control
Slowly lower the leg back down without letting it completely rest on the bottom leg.
Step 7: Repeat the Movement
Perform 10–15 controlled repetitions, then switch sides and repeat on the other leg.
Benefits of Side-Lying Leg Lifts
1. Strengthens Outer Thighs
Side-Lying Leg Lifts target the outer thigh muscles (abductors), helping tone and shape the legs without bulky muscle growth.
2. Activates the Glutes
This exercise engages the gluteus medius, an important muscle that supports hip stability and improves lower-body strength.
3. Improves Hip Stability
By strengthening the muscles around the hips, this movement helps improve balance and reduces the risk of injury during daily activities or workouts.
4. Enhances Core Engagement
Even though it focuses on the legs, your core muscles must stay active to keep your body aligned during the exercise.
5. Supports Better Posture
Stronger hips and glutes contribute to better posture and spinal alignment, especially when standing or walking.
6. Low-Impact and Joint Friendly
Side-Lying Leg Lifts are gentle on the knees and lower back, making them ideal for beginners and people recovering from injuries.
Why Women Love It:
- Targets outer thighs and glutes
- No equipment required
- Ideal for beginners
This move is often taught in both mat Pilates and Reformer training, especially for women seeking toned hips.
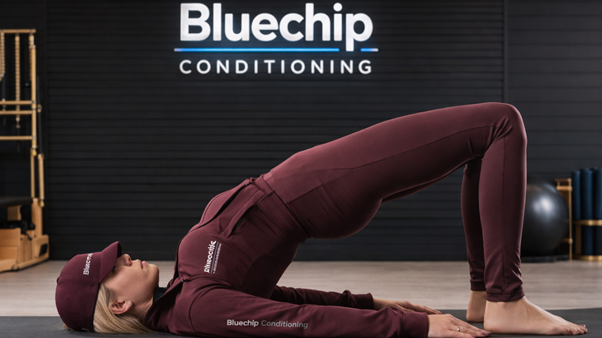
3. Pilates Glute Bridge
The Pilates Glute Bridge is one of the most powerful exercises for strengthening the glutes, hamstrings, and lower body while also supporting core stability. Unlike traditional bridges done quickly in the gym, Pilates focuses on slow, controlled movement and proper spinal alignment. This helps activate the deep muscles of the hips and glutes, making the exercise highly effective for building strength and improving posture.
This exercise directly targets glutes and hamstrings while protecting the lower back.
How to Perform the Pilates Glute Bridge
Step 1: Start in the Correct Position
Lie flat on your back on an exercise mat with your knees bent and feet placed hip-width apart. Keep your feet flat on the floor and your arms resting by your sides with palms facing down.
Step 2: Align Your Body
Position your heels about a foot away from your hips so that your fingertips can lightly touch the back of your heels. Keep your spine neutral and engage your core muscles.
Step 3: Activate Your Core and Glutes
Before lifting, gently tighten your abdominal muscles and squeeze your glutes. This prepares your body for the movement and protects the lower back.
Step 4: Lift Your Hips Slowly
Press your feet into the floor and slowly lift your hips upward toward the ceiling. Raise your hips until your body forms a straight line from your shoulders to your knees.
Step 5: Hold the Bridge Position
Pause at the top for a few seconds while squeezing your glutes and maintaining strong core engagement.
Step 6: Lower with Control
Slowly lower your hips back down to the mat one vertebra at a time, maintaining control throughout the movement.
Step 7: Repeat the Exercise
Perform 10–15 repetitions while focusing on controlled breathing and smooth movement.
Benefits of the Pilates Glute Bridge
1. Strengthens the Glutes
The Pilates Glute Bridge directly targets the glute muscles, helping build strength and create a lifted, toned appearance.
2. Improves Hip Stability
Strong glutes support the hips and pelvis, which improves balance and stability during daily movements and workouts.
3. Supports Lower Back Health
By strengthening the muscles that support the spine, this exercise helps reduce lower back strain and improves spinal alignment.
4. Engages the Core Muscles
While lifting the hips, the abdominal muscles remain active to stabilize the body, helping build overall core strength.
5. Enhances Posture
Strong glutes and hips play an important role in maintaining proper posture when standing, walking, or sitting.
6. Low-Impact and Beginner Friendly
The Pilates Glute Bridge is gentle on the joints and can be easily modified, making it ideal for beginners or those recovering from injury.
Why It Works:
- Activates glute muscles deeply
- Improves hip stability
- Enhances fat-burning through muscle engagement
Adding this to your daily pilates leg exercises routine helps lift and firm the glutes naturally.
4. Inner Thigh Pilates Lift
Inner thigh fat is stubborn for many women, and pilates leg exercises address this area safely.
The Inner Thigh Pilates Lift is an excellent exercise designed to strengthen and tone the inner thigh muscles while improving lower-body stability and control. In Pilates, this movement focuses on activating the adductor muscles the muscles located on the inside of your thighs. These muscles play an important role in leg alignment, balance, and hip stability.
Many people struggle with inner thigh strength, and traditional workouts often overlook this area. The Inner Thigh Pilates Lift specifically targets these muscles through slow, controlled movement, helping create stronger, more balanced legs while supporting overall lower-body function.
How to Perform the Inner Thigh Pilates Lift
Step 1: Lie on Your Side
Start by lying on your side on a comfortable exercise mat. Extend your bottom leg straight along the mat while keeping your body aligned from head to toe.
Step 2: Position the Top Leg
Bend your top leg and place the foot in front of your bottom leg on the floor. This position allows your bottom leg to move freely while providing stability.
Step 3: Support Your Upper Body
Rest your head on your lower arm or support it with your hand. Place your top hand on the mat in front of your chest to help maintain balance.
Step 4: Engage Your Core
Tighten your abdominal muscles slightly to stabilize your body and prevent rolling forward or backward during the movement.
Step 5: Lift the Bottom Leg
Slowly lift your bottom leg upward a few inches off the mat while keeping the leg straight. Focus on using the inner thigh muscles to lift the leg rather than swinging it.
Step 6: Hold the Position
Pause briefly at the top of the movement and squeeze the inner thigh muscles.
Step 7: Lower with Control
Slowly lower the leg back down to the mat without relaxing completely. Maintain control throughout the movement.
Step 8: Repeat and Switch Sides
Perform 10–15 repetitions, then switch to the other side and repeat the exercise.
Benefits of the Inner Thigh Pilates Lift
1. Strengthens Inner Thigh Muscles
This exercise directly targets the adductor muscles, helping tone and strengthen the inner thighs effectively.
2. Improves Leg Stability
Stronger inner thighs help stabilize the legs during walking, running, and other lower-body movements.
3. Enhances Hip Alignment
Balanced inner thigh strength supports proper hip positioning and improves overall body alignment.
4. Supports Better Balance
Because the inner thigh muscles contribute to leg stability, strengthening them can improve balance and coordination.
5. Helps Create Lean Muscle Tone
Pilates movements focus on controlled muscle activation, which helps build long, lean muscle rather than bulky muscle mass.
6. Low-Impact and Joint Friendly
The Inner Thigh Pilates Lift places minimal stress on the knees and hips, making it suitable for beginners and individuals with joint sensitivity.
How It Helps:
- Tones adductor muscles
- Improves balance and leg control
- Builds long, lean muscle fibers
5. Pilates Kick Series
The Pilates Kick Series is a dynamic Pilates movement designed to strengthen the legs, glutes, and core while improving coordination and flexibility. This exercise focuses on controlled kicking motions that activate multiple lower-body muscles at the same time. Unlike traditional leg workouts that isolate a single muscle group, the Pilates Kick Series trains the body to move in a coordinated and balanced way.
Because the movement requires stability and control, it also engages the core and hip stabilizing muscles. This makes the Pilates Kick Series an excellent addition to lower-body workouts for improving strength, muscle tone, and overall movement efficiency.
The kick series strengthens legs while challenging core stability.
How to Perform the Pilates Kick Series
Step 1: Start in a Side-Lying Position
Lie on your side on a comfortable exercise mat with your legs extended straight. Support your head with your lower arm or rest your head on your hand.
Step 2: Align Your Body
Stack your hips directly on top of each other and keep your body in a straight line. Engage your core muscles to maintain stability.
Step 3: Lift the Top Leg
Raise your top leg slightly above hip level while keeping the leg straight and your foot flexed.
Step 4: Kick the Leg Forward
Slowly swing the raised leg forward in a controlled kicking motion. Keep the movement smooth and avoid swinging too quickly.
Step 5: Kick the Leg Back
Bring the leg back behind your body while maintaining control and keeping your hips stable. Focus on engaging the glutes during the backward movement.
Step 6: Maintain Core Stability
Keep your abdominal muscles engaged throughout the exercise to prevent your torso from rocking forward or backward.
Step 7: Repeat the Movement
Perform 10–12 controlled forward and backward kicks, then switch to the other side and repeat the exercise.
Benefits of the Pilates Kick Series
1. Strengthens the Legs and Glutes
The Pilates Kick Series targets the thighs, hamstrings, and glute muscles, helping improve lower-body strength and muscle tone.
2. Improves Hip Mobility
The controlled kicking motion increases flexibility and mobility in the hip joints, which supports better movement during daily activities.
3. Enhances Core Stability
Your core muscles must stay engaged to stabilize your body while the leg moves, helping strengthen the abdominal muscles.
4. Improves Coordination and Control
The forward and backward kicking movement trains the body to move with balance and control, which improves overall coordination.
5. Supports Lean Muscle Development
Pilates exercises focus on slow, controlled muscle engagement, helping build long and lean muscles rather than bulky muscle mass.
6. Low-Impact and Joint Friendly
This exercise places minimal stress on the knees and hips, making it suitable for beginners and individuals looking for a gentle yet effective lower-body workout.
Key Advantages:
- Shapes thighs and glutes
- Improves coordination
- Boosts calorie burn without impact
This move is commonly included in pilates classes in las vegas focused on lower-body sculpting.
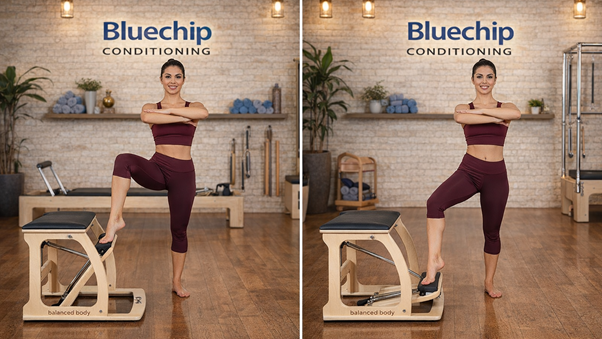
6. Standing Pilates Leg Press
The Standing Pilates Leg Press is a functional Pilates movement that strengthens the thighs, glutes, and hips while also improving balance and stability. Unlike many floor-based Pilates exercises, this movement is performed in a standing position, which makes it closer to the way the body moves in everyday activities like walking, climbing stairs, or standing up from a chair.
This exercise focuses on controlled leg extension and core engagement. By pressing one leg away from the body while maintaining balance, the Standing Pilates Leg Press activates multiple muscle groups at the same time. It helps build strength in the lower body while also training coordination and posture.
A functional move that mimics everyday movements.
How to Perform the Standing Pilates Leg Press
Step 1: Start in a Standing Position
Stand upright with your feet hip-width apart. Keep your shoulders relaxed and your spine straight. Engage your core muscles to support your posture.
Step 2: Shift Your Weight
Transfer your body weight onto one leg while keeping the other leg lightly touching the floor for balance.
Step 3: Prepare the Working Leg
Lift the non-supporting leg slightly off the ground and bend the knee. Maintain a stable posture and keep your hips facing forward.
Step 4: Press the Leg Forward or Backward
Slowly extend the lifted leg forward or slightly backward as if you are pressing the leg away from your body. Keep the movement controlled and avoid leaning your upper body.
Step 5: Hold the Position Briefly
Pause for a moment at the end of the movement while engaging your thigh and glute muscles.
Step 6: Return to the Starting Position
Slowly bring the leg back to the starting position while maintaining balance and control.
Step 7: Repeat and Switch Legs
Perform 10–12 repetitions on one leg, then switch to the other side and repeat the exercise.
Benefits of the Standing Pilates Leg Press
1. Strengthens Thighs and Glutes
The exercise targets the quadriceps, hamstrings, and glute muscles, helping tone and strengthen the lower body.
2. Improves Balance and Stability
Because the movement is performed on one leg, it challenges balance and strengthens stabilizing muscles in the hips and core.
3. Supports Functional Movement
The standing position mimics natural body movements used in daily life, making the exercise highly practical and beneficial.
4. Enhances Core Engagement
Maintaining balance during the exercise requires constant activation of the abdominal muscles, helping improve core strength.
5. Encourages Better Posture
Standing Pilates exercises train the body to maintain proper alignment, which supports better posture during everyday activities.
6. Low-Impact and Joint Friendly
The controlled movement places minimal stress on the knees and hips, making it suitable for beginners and those looking for a gentle strength exercise.
Why It’s Powerful:
- Enhances balance
- Strengthens thighs and glutes
- Supports posture correction
This exercise blends flexibility and strength training, a core principle of Pilates.
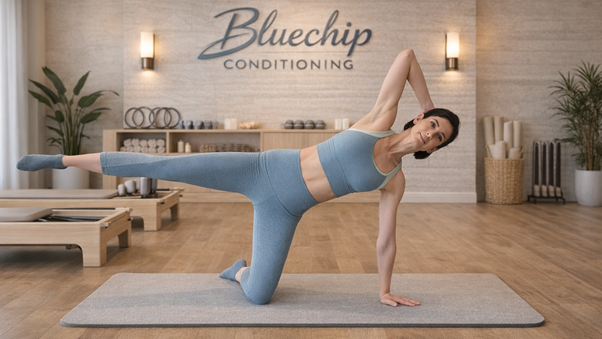
7. Pilates Side Kicks
Pilates Side Kicks are a powerful lower-body exercise that targets the hips, outer thighs, and glutes while also strengthening the core. This movement is a classic Pilates exercise that focuses on controlled leg motion combined with core stability. It helps improve muscle balance, coordination, and flexibility in the lower body.
Unlike traditional leg workouts that only focus on strength, Pilates Side Kicks combine strength, flexibility, and stability in a single movement. Because the exercise requires you to stabilize your torso while moving the leg, it also activates the deep abdominal muscles. This makes it an excellent exercise for building strong, toned legs while supporting overall body control.
Side kicks are advanced yet accessible pilates leg exercises for women wanting sculpted legs.
How to Perform Pilates Side Kicks
Step 1: Begin in a Side-Lying Position
Lie on your side on a comfortable exercise mat. Extend both legs straight and keep your body aligned from head to feet.
Step 2: Support Your Upper Body
Prop yourself up on your lower forearm or rest your head on your arm for support. Place your top hand on the mat in front of your chest to maintain balance.
Step 3: Align Your Hips and Core
Stack your hips directly on top of each other and engage your core muscles to keep your body stable during the movement.
Step 4: Lift the Top Leg
Raise your top leg to about hip height while keeping the leg straight and your foot flexed.
Step 5: Kick the Leg Forward
Slowly swing your top leg forward in a controlled motion. Keep your torso steady and avoid leaning forward.
Step 6: Kick the Leg Back
Move the leg backward while keeping it straight and engaging the glutes. Maintain stable hips and controlled movement.
Step 7: Repeat the Movement
Perform 10–12 forward and backward kicks while maintaining steady breathing and core engagement. Then switch sides and repeat the exercise.
Benefits of Pilates Side Kicks
1. Strengthens Outer Thighs and Glutes
Pilates Side Kicks target the outer thighs and glute muscles, helping create stronger and more toned legs.
2. Improves Hip Stability
This exercise strengthens the muscles around the hips, which helps improve stability and balance during movement.
3. Enhances Core Strength
Keeping the body stable during the kicking motion activates the abdominal muscles and improves core control.
4. Increases Flexibility and Mobility
The forward and backward leg movement improves flexibility and mobility in the hip joints.
5. Supports Better Body Coordination
The controlled kicking pattern helps improve coordination between the lower body and core muscles.
6. Low-Impact and Beginner Friendly
Pilates Side Kicks are gentle on the joints and can be easily modified, making them suitable for beginners as well as advanced practitioners.
8. Single-Leg Stretch
The Single-Leg Stretch is a classic Pilates exercise that focuses on strengthening the core while also engaging the legs and hip flexors. Although it is primarily known as an abdominal exercise, it plays an important role in lower-body training because the legs remain active throughout the movement. This combination of core stability and leg movement helps improve coordination, muscle control, and overall body strength.
In Pilates, the Single-Leg Stretch emphasizes controlled breathing and smooth movement. Instead of rushing through repetitions, the exercise encourages slow and precise motion, allowing the core and leg muscles to work together efficiently. This makes it an excellent exercise for building both strength and endurance without placing unnecessary stress on the joints.

How to Perform the Single-Leg Stretch
Step 1: Start on Your Back
Lie flat on your back on an exercise mat with your knees bent and feet resting on the floor. Keep your arms relaxed by your sides.
Step 2: Lift Your Head and Shoulders
Gently lift your head, neck, and shoulders off the mat while engaging your abdominal muscles. Keep your lower back pressed gently into the mat for support.
Step 3: Bring One Knee Toward Your Chest
Pull one knee toward your chest and hold it lightly with both hands—one hand on the knee and the other near the ankle.
Step 4: Extend the Opposite Leg
Stretch the other leg out straight at about a 45-degree angle above the floor. Keep the leg long and strong without letting it drop too low.
Step 5: Switch Legs Smoothly
Slowly switch legs by bringing the extended leg toward your chest while extending the other leg outward.
Step 6: Maintain Core Engagement
Keep your abdominal muscles engaged throughout the exercise to stabilize your body and protect your lower back.
Step 7: Continue the Alternating Movement
Repeat the alternating leg movement for 10–15 repetitions while maintaining steady breathing and controlled motion.
Benefits of the Single-Leg Stretch
1. Strengthens the Core Muscles
The Single-Leg Stretch strongly activates the abdominal muscles, helping build core strength and stability.
2. Engages the Leg Muscles
While the core works to stabilize the body, the legs remain active, strengthening the hip flexors and thigh muscles.
3. Improves Coordination
The alternating leg movement helps improve coordination between the upper body, core, and legs.
4. Enhances Muscle Control
Pilates emphasizes controlled motion, which improves muscle awareness and overall body control.
5. Supports Better Posture
A stronger core helps support the spine and improves posture during everyday activities.
6. Low-Impact and Joint Friendly
The exercise places minimal stress on the knees and hips, making it suitable for beginners and those looking for a gentle yet effective workout.
Why It’s Effective:
- Burns fat through muscle engagement
- Builds coordination
- Strengthens thighs without strain
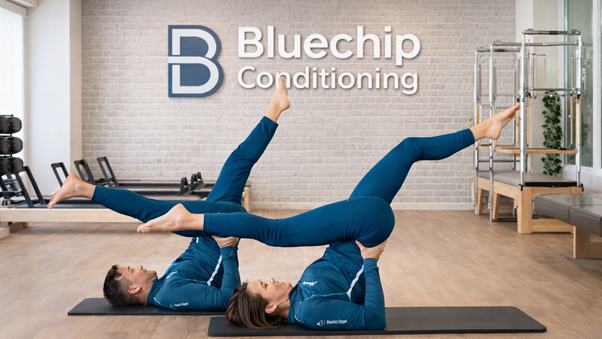
9. Pilates Scissor Legs
Pilates Scissor Legs is a classic Pilates movement that strengthens the thighs, hip flexors, and core while improving flexibility and control. This exercise involves alternating leg movements that resemble a scissor motion, which is why it gets its name. It challenges both the abdominal muscles and the legs at the same time, making it a powerful full-body movement within a Pilates routine.
In Pilates training, Scissor Legs focuses on slow and controlled motion rather than speed. The goal is to maintain strong core engagement while the legs move independently. This helps improve muscle coordination, flexibility in the hamstrings, and overall lower-body strength.
A classic move in pilates leg exercises for toning thighs and hips.
How to Perform Pilates Scissor Legs
Step 1: Start on Your Back
Lie flat on your back on an exercise mat with both legs extended and your arms resting by your sides.
Step 2: Lift Your Legs Upward
Raise both legs toward the ceiling while keeping them straight. Engage your core muscles to support your lower back.
Step 3: Lift Your Head and Shoulders
Gently lift your head and shoulders off the mat. Place your hands behind one leg, lightly holding your calf or thigh for support.
Step 4: Lower One Leg
Slowly lower the opposite leg toward the floor while keeping it straight. Do not let the leg drop too low to maintain core engagement.
Step 5: Switch Legs
Bring the lowered leg back up while lowering the other leg. Continue alternating legs in a controlled scissor-like motion.
Step 6: Maintain Core Stability
Keep your abdominal muscles engaged and your lower back supported on the mat throughout the movement.
Step 7: Repeat the Exercise
Perform 10–12 controlled repetitions on each leg while maintaining smooth breathing and steady movement.
Benefits of Pilates Scissor Legs
1. Strengthens Thigh and Hip Muscles
Pilates Scissor Legs effectively targets the thighs and hip flexors, helping build stronger and more toned legs.
2. Improves Core Strength
The exercise requires constant core engagement to stabilize the body, making it highly effective for strengthening abdominal muscles.
3. Enhances Hamstring Flexibility
The alternating leg movement stretches the hamstrings, which helps improve flexibility and range of motion.
4. Boosts Coordination and Control
The scissor motion trains the body to coordinate leg movement while maintaining upper-body stability.
5. Supports Lean Muscle Development
Pilates exercises focus on controlled muscle engagement, which helps create long, lean muscle tone instead of bulky muscle mass.
6. Low-Impact and Safe for Most Fitness Levels
Because the movement is controlled and gentle on the joints, it is suitable for beginners as well as more advanced Pilates practitioners.
Results You’ll Notice:
- Improved flexibility
- Stronger hip flexors
- Leaner leg appearance
This exercise is often taught in both mat classes and Reformer training sessions.
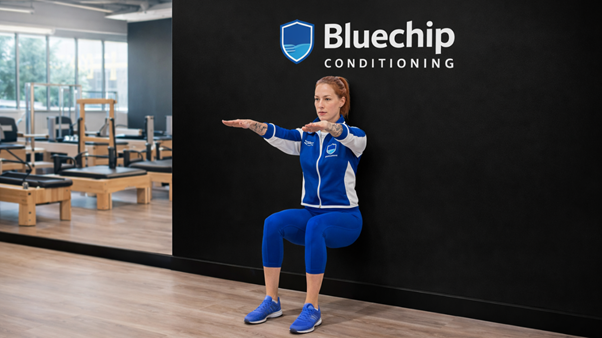
10. Wall-Supported Pilates Squat
The Wall-Supported Pilates Squat is a beginner-friendly lower-body exercise that strengthens the thighs, glutes, and core while promoting proper body alignment. Unlike traditional squats that can sometimes place pressure on the knees or lower back, this Pilates variation uses a wall for support, helping maintain correct posture and controlled movement.
This exercise focuses on slow, precise motion, which is a core principle of Pilates training. By using the wall as a guide, the body stays aligned and stable, allowing the leg muscles to activate more effectively. The Wall-Supported Pilates Squat is especially useful for beginners, individuals recovering from injury, or anyone looking for a safe and low-impact way to build lower-body strength.
How to Perform the Wall-Supported Pilates Squat
Step 1: Stand Against the Wall
Stand with your back flat against a wall. Position your feet about shoulder-width apart and place them slightly forward, about one to two feet away from the wall.
Step 2: Align Your Body
Keep your shoulders, upper back, and hips touching the wall. Engage your core muscles and maintain a neutral spine.
Step 3: Begin the Squat Movement
Slowly slide your back down the wall by bending your knees. Keep your feet firmly planted on the floor and your knees aligned with your toes.
Step 4: Lower Into the Squat Position
Continue sliding down until your thighs are nearly parallel to the floor or as low as comfortable while maintaining proper alignment.
Step 5: Hold the Position Briefly
Pause for a few seconds at the bottom of the squat while engaging your thighs and glute muscles.
Step 6: Return to the Starting Position
Slowly press through your heels and slide your back up the wall until you return to a standing position.
Step 7: Repeat the Exercise
Perform 10–12 controlled repetitions while focusing on steady breathing and proper posture.
Benefits of the Wall-Supported Pilates Squat
1. Strengthens Thighs and Glutes
This exercise targets the quadriceps and glute muscles, helping build strength and tone in the lower body.
2. Improves Lower-Body Stability
The controlled movement strengthens the muscles that support the knees and hips, improving overall stability.
3. Encourages Proper Squat Form
Using the wall as support helps maintain correct alignment, making it easier to learn proper squat technique.
4. Supports Core Engagement
Keeping the spine aligned against the wall requires activation of the core muscles, which improves abdominal strength.
5. Low-Impact and Joint Friendly
The wall support reduces stress on the knees and lower back, making this exercise safe for beginners or individuals with joint sensitivity.
6. Improves Posture and Balance
Maintaining alignment during the squat helps train the body to move with better posture and balance.
Why Women Prefer It:
- Protects knees and joints
- Strengthens glutes and thighs
- Encourages proper alignment
This move is perfect for home workouts or studio sessions.
Pilates vs Traditional Leg Workouts
Many women ask why pilates leg exercises are more effective than gym leg workouts.
Pilates Advantages:
- No heavy equipment
- Lower injury risk
- Sustainable fat loss
- Muscle lengthening, not bulking
That’s why Pilates is widely recommended in pilates in las vegas fitness communities.
Fat Loss and Lean Muscle with Pilates
Pilates leg exercises support fat loss by increasing muscle tone, improving metabolism, and encouraging mindful movement. While Pilates may not look intense, its muscle engagement creates long-term body transformation.
Combined with a healthy diet and consistency, Pilates reshapes legs naturally without extreme strain.
Home Pilates vs Studio Training
You can practice pilates leg exercises at home or attend professional sessions. Studios offer expert guidance, especially in a pilates reformer studio las vegas, where resistance enhances muscle engagement.
However, beginners can start with mat Pilates and still see impressive results.
Why Women in Las Vegas Choose Pilates
Women prefer Pilates because it fits all lifestyles whether you attend pilates classes in las vegas or practice at home. Pilates improves confidence, posture, and body awareness while delivering visible leg toning.
Frequently Asked Questions About Pilates Leg Exercises
1. Are Pilates leg exercises effective for toning thighs and glutes?
Yes, pilates leg exercises are extremely effective for toning thighs and glutes, especially for women. Pilates focuses on slow, controlled movements that activate deep muscle layers rather than just surface muscles. This leads to lean muscle development, improved muscle definition, and a lifted appearance in the glutes and thighs.
Unlike traditional workouts that can cause muscle bulk, Pilates lengthens and strengthens muscles simultaneously. With consistent practice, women experience firmer legs, better muscle balance, and improved posture.
2. Can Pilates leg exercises help with fat loss?
Absolutely. While Pilates may not look intense, pilates leg exercises promote fat loss by increasing muscle engagement, improving metabolic efficiency, and enhancing overall body awareness. Muscle tone plays a key role in fat reduction because lean muscle helps burn more calories throughout the day.
When combined with a balanced diet and regular sessions, Pilates supports sustainable fat loss especially in stubborn areas like inner thighs and hips.
3. How often should women do Pilates leg exercises for best results?
For optimal results, women should practice pilates leg exercises 3 to 5 times per week. Beginners can start with 2–3 sessions and gradually increase frequency as strength improves.
Consistency matters more than intensity. Even short sessions, when done regularly, can lead to noticeable improvements in leg tone, flexibility, and muscle endurance within a few weeks.
4. Are Pilates leg exercises suitable for beginners?
Yes, pilates leg exercises are one of the most beginner-friendly workout options available. Pilates emphasizes proper alignment, breathing, and controlled movement, making it safe for women of all fitness levels.
Many exercises can be modified based on strength and mobility, which is why Pilates is often recommended for beginners, post-injury recovery, and those returning to exercise after a break.
5. Do I need equipment to do Pilates leg exercises?
No, many pilates leg exercises are designed to be performed with no equipment, using only body weight and controlled movement. Mat Pilates is highly effective for leg toning and fat loss.
However, advanced training options like Reformer training add resistance and variety, helping women progress faster and target muscles more deeply—but they are optional, not required.
6. What’s the difference between mat Pilates and reformer Pilates for leg workouts?
Mat Pilates relies on body weight and gravity to perform pilates leg exercises, making it ideal for beginners and home workouts. It builds foundational strength, balance, and flexibility.
Reformer Pilates uses a specialized machine with springs and resistance. Training in a pilates reformer studio las vegas allows for more precise muscle targeting, deeper engagement, and progressive resistance great for women seeking faster or more advanced results.
7. Can Pilates improve flexibility and strength at the same time?
Yes, Pilates is unique because it combines flexibility and strength training in every movement. Pilates leg exercises lengthen muscles while strengthening them, which improves joint mobility, muscle balance, and overall athletic performance.
This dual benefit helps prevent injuries and keeps muscles strong without feeling tight or stiff.
8. How long does it take to see results from Pilates leg exercises?
Most women notice improved muscle engagement and posture within 2–3 weeks of consistent practice. Visible changes in leg tone and strength typically appear within 4–8 weeks, depending on frequency, diet, and intensity.
Because pilates leg exercises focus on long-term muscle adaptation, results are gradual but lasting.
9. Are Pilates leg exercises safe for knee and joint health?
Yes, pilates leg exercises are low-impact and joint-friendly, making them ideal for women with knee sensitivity or joint concerns. Pilates strengthens the muscles that support joints, improving stability and reducing stress on knees and hips.
This is why Pilates is often recommended by physical therapists and fitness professionals for injury prevention and rehabilitation.
10. Should I take Pilates classes or practice at home?
Both options are effective, but each offers unique benefits. Home practice is convenient and great for beginners learning pilates leg exercises. However, attending professional sessions ensures correct form, personalized guidance, and faster progression.
Women who attend pilates classes in las vegas or train with experts at Blue Chip Conditioning benefit from professional coaching, structured programs, and access to advanced techniques that maximize results safely.
Transform Your Legs Naturally with Pilates Start Your Journey Today
Toned thighs and sculpted glutes are not about extreme workouts or heavy gym equipment they are about consistency, proper movement, and intelligent muscle activation. This is exactly why pilates leg exercises are one of the most effective training methods for women who want visible results without stress on their joints or body.
Through controlled movements, deep muscle engagement, and mindful breathing, Pilates helps you burn fat, build lean muscle, and improve flexibility at the same time. Unlike traditional leg workouts that focus only on surface muscles, Pilates targets the deep stabilizing muscles of the hips, thighs, and glutes. This leads to long, lean muscle tone, improved posture, and better balance in everyday life.
Another powerful advantage of pilates leg exercises is their accessibility. Whether you are a complete beginner, returning after a long break, or simply looking for a low-impact alternative, Pilates adapts to your body. With no equipment required for many movements, you can start right at home or elevate your results by training in a professional studio environment.
For women who want guided support, structured programs, and faster progress, working with expert instructors makes a huge difference. At Blue Chip Conditioning, women have access to professional coaching, personalized programming, and a supportive environment designed to help you move better and feel stronger. Whether you’re exploring mat Pilates or advancing into Reformer training, expert guidance ensures correct form, maximum muscle activation, and safer results.
If you’re ready to reshape your legs, boost confidence, and build a stronger lower body, now is the perfect time to take action. Commit to pilates leg exercises, stay consistent, and trust the process your body will respond.
Ready to Get Started?
Explore expert-led Pilates programs, join high-quality pilates classes in las vegas, or book your session at a trusted pilates reformer studio las vegas today. Discover how Pilates can transform your thighs, glutes, and overall strength naturally, safely, and effectively.
Your journey to leaner legs and a stronger body starts now.